Thursday, June 26, 2014

Google Play services 4 3

gps

Google Play services 4.3 has now been rolled out to the world, and it contains a number of features you can use to improve your apps. Specifically, this version adds some new members to the Google Play services family: Google Analytics API, Tag Manager, and the Address API. We’ve also made some great enhancements to the existing APIs; everything to make sure you stay on top of the app game out there.


Here are the highlights of the 4.3 release.


Google Analytics and Google Tag Manager

The Analytics API and Google Tag Manager has existed for Android for some time as standalone technologies, but with this release we are incorporating them as first class citizens in Google Play services. Those of you that are used to the API will find it very similar to previous versions, and if you have not used it before we strongly encourage you to take a look at it.

Google Analytics allows you to get detailed statistics on how you app is being used by your users, for example what functionality of your app is being used the most, or which activity triggers users to convert from an advertised version of an app to paid one. Google Tag Manager lets you change characteristics of your app on-the-fly, for example colors, without having to push an update from Google Play.


Google Play Games services Update

The furious speed of innovation in Android mobile gaming has not slowed down and neither have we when it comes to packing the Google Play Game services API with features.

With this release, we are introducing game gifts, which allows players to send virtual in-game requests to anyone in their Google+ circles or through player search. Using this feature, the player can send a wish request to ask another player for an in-game item or benefit, or a gift request to grant an item or benefit to another player.

This is a great way for a game to be more engaging by increasing cross player collaboration and social connections. We are therefore glad to add this functionality as an inherent part of the Games API, it is an much-wanted extension to the multi-player functionality included a couple of releases ago. For more information, see: Unlocking the power of Google for your games.


Drive API

The Google Drive for Android API was just recently added as a member of the Google Play services API family. This release adds a number of important features:

  • Pinning - You can now pin files that should be kept up to date locally, ensuring that it is available when the user is offline. This is great for users that need to use your app with limited or no connectivity


  • App Folders - An app often needs to create files which are not visible to the user, for example to store temporary files in a photo editor. This can now be done using App Folders, a feature is analogous to Application Data Folders in the Google Drive API


  • Change Notifications - You can now register a callback to receive notifications when a file or folder is changed. This mean you no longer need to query Drive continuously to check if the data has changed, just put a change notification on it


In addition to the above, weve also added the ability to access a number of new metadata fields.


Address API

This release will also includes a new Address API, which allows developers to request access to addresses for example to fill out a delivery address form. The kicker is the convenience for the user; a user interface component is presented where they select the desired address, and bang, the entire form is filled out. Developers have been relying on Location data which works very well, but this API shall cater for cases where the Location data is either not accurate or the user actually wants to use a different address than their current physical location. This should sound great to anyone who has done any online shopping during the last decade or so.


That’s it for this time. Now go to work and incorporate these new features to make your apps even better!

And stay tuned for future updates.


For the release video, please see:

DevBytes: Google Play Services 4.3


For details on the APIs, please see:

Google Analytics

Google Tag Manager

Google Play Games services Gifts

Google Drive Android API - Change Events

Google Drive Android API - Pinning

Google Drive Android API - App Folder

Address API


Read More..

Apps that work together

Android applications can easily be linked together using intents. One example of this involves Shazam, MySpace, and the Amazon MP3 Store. Once Shazam has identified a song, you can also search for the artists official MySpace profile page or buy the song via via the Amazon MP3 app. Here, the three developers behind these apps talk about how they accomplished this:

To hear more about how the MySpace app for Android was built and lessons learned, watch Matt Kanninen:

Tomasz Zawada of Shazam also talks about his opinions on the Android platform and has some tips for developers building Android apps:

These and the other Android app developer videos can be found here.

Read More..

New Social APIs in Android ICS

[This post is by Daniel Lehmann, Tech Lead on the Android Apps team. — Tim Bray]

[We’re trying something new; There’s a post over on Google+ where we’ll host a discussion of this article. Daniel Lehmann has agreed to drop by and participate. Come on over and join in!]

With Android Ice Cream Sandwich, we set out to build software that supports emotional connections between humans and the devices they carry. We wanted to build the most personal device that the user has ever owned.

The first ingredient in our recipe is to show users the people that they care about most in a magazine-like way. High-resolution photos replace simple lists of text.

The second ingredient is to more prominently visualize their friends’ activities. We show updates from multiple sources wherever a contact is displayed, without the need to open each social networking app individually.

Android is an open platform, and in Ice Cream Sandwich we provide a rich new API to allow any social networking application to integrate with the system. This post explains how apps like Google+ use these APIs, and how other social networks can do the same.

A few basics

Since Eclair (Android 2.0), the system has been able to join contacts from different sources. Android can notice if you are connected to the same person and different networks, and join those into aggregate contacts.

Essential terms to understand throughout the remainder of this post are:

  • RawContact is a contact as it exists in one source, for example a friend in Skype.

  • Data rows exists for each piece of information that the raw contact contains (name, phone number, email address, etc.).

  • A Contact joins multiple raw contacts into one aggregate. This is what the user perceives as a real contact in the People and Phone apps.

  • A sync adapter synchronizes its raw contacts with its cloud source. It can be bundled with a Market application (examples: Skype, Twitter, Google+).

While users deal with contacts, sync adapters work with their raw contact rows. They own the data inside a raw contact, but by design it is left up to Android to properly join raw contact rows with others.

Contacts sync adapters have a special xml file that describes their content, which is documented in the Android SDK. In the following paragraphs, we’ll assume this file is named contacts.xml.

The Android SDK also contains the application SampleSyncAdapter (and its source code) that implements everything mentioned in here in an easy to understand way.

High resolution photos

In Android versions prior to Honeycomb (3.0), contact photos used to be 96x96. Starting with ICS, they now have a thumbnail (which is the 96x96 version) and a display photo. The display photo’s maximum size can vary from device to device (On Galaxy Nexus and Nexus S, it is currently configured to be 256x256, but expect this to vary with future devices). The size as configured can be queried like this:

private static int getPhotoPickSize(Context context) {
// Note that this URI is safe to call on the UI thread.
Cursor c = context.getContentResolver().query(DisplayPhoto.CONTENT_MAX_DIMENSIONS_URI,
new String[]{ DisplayPhoto.DISPLAY_MAX_DIM }, null, null, null);
try {
c.moveToFirst();
return c.getInt(0);
} finally {
c.close();
}
}

This value is useful if you need to query the picture from the server (as you can specify the right size for the download). If you already have a high resolution picture, there is no need for any resizing on your side; if it is too big, the contacts provider will downsample it automatically.

Up until now, pictures were written using a ContentValues object, just like all the other data rows of the raw contact. While this approach is still supported, it might fail when used with bigger pictures, as there is a size limit when sending ContentValues across process boundaries. The prefered way now is to use an AssetFileDescriptor and write them using a FileOutputStream instead:

private static void saveBitmapToRawContact(Context context, long rawContactId, byte[] photo) throws IOException {
Uri rawContactUri = ContentUris.withAppendedId(RawContacts.CONTENT_URI, rawContactId);
Uri outputFileUri =
Uri.withAppendedPath(rawContactUri, RawContacts.DisplayPhoto.CONTENT_DIRECTORY);
AssetFileDescriptor descriptor = context.getContentResolver().openAssetFileDescriptor(
outputFileUri, "rw");
FileOutputStream stream = descriptor.createOutputStream();
try {
stream.write(photo);
} finally {
stream.close();
descriptor.close();
}
}

For best results, store uncompressed square photos and let the contacts provider take care of compressing the photo. It will create both a thumbnail and a display photo as necessary.

This API is available on API version 14+. For older versions, we recommend to fallback to the old method using ContentValues and assuming a constant size of 96x96.

Update streams

The API for update streams is the biggest new addition for contacts in Ice Cream Sandwich. Sync adapters can now enrich their contact data by providing a social stream that includes text and photos.

This API is intended to provide an entry point into your social app to increase user engagement. We chose to only surface the most recent few stream items, as we believe that your social app will always be the best way to interact with posts on your network.

StreamItems rows are associated with a raw contact row. They contain the newest updates of that raw contact, along with text, time stamp and comments. They can also have pictures, which are stored in StreamItemPhotos. The number of stream items per raw contact has a limit, which on the current Nexus devices is set to 5, but expect this number to change with future devices. The limit can be queried like this:

private static int getStreamItemLimit(Context context) {
// Note that this URI is safe to call on the UI thread.
Cursor c = context.getContentResolver().query(StreamItems.CONTENT_LIMIT_URI,
new String[]{ StreamItems.MAX_ITEMS }, null, null, null);
try {
c.moveToFirst();
return c.getInt(0);
} finally {
c.close();
}
}

When displayed in the People app, stream items from all participating raw contacts will be intermixed and shown chronologically.

The following function shows how to add a stream item to an existing raw contact:

private static void addContactStreamItem(Context context, long rawContactId, String text,
String comments, long timestamp, String accountName, String accountType){
ContentValues values = new ContentValues();
values.put(StreamItems.RAW_CONTACT_ID, rawContactId);
values.put(StreamItems.TEXT, "Breakfasted at Tiffanys");
values.put(StreamItems.TIMESTAMP, timestamp);
values.put(StreamItems.COMMENTS, comments);
values.put(StreamItems.ACCOUNT_NAME, accountName);
values.put(StreamItems.ACCOUNT_TYPE, accountType);
context.getContentResolver().insert(StreamItems.CONTENT_URI, values);
}

You can also specify an action that should be executed when a stream item or one of its photos is tapped. To achieve this, specify the receiving Activities in your contacts.xml using the tags viewStreamItemActivity and viewStreamItemPhotoActivity:

<ContactsAccountType
xmlns:android="http://schemas.android.com/apk/res/android"
viewStreamItemActivity="com.example.activities.ViewStreamItemActivity”
viewStreamItemPhotoActivity="com.example.activities.ViewStreamItemPhotoActivity">
<!-- Description of your data types -->
</ContactsAccountType>

Update streams are available on API version 15+ and are intended to replace the StatusUpdate API. For previous versions, we recommend that you fall back to the StatusUpdates API, which only shows a single text item and no pictures.

“Me” profile

Ice Cream Sandwich is the first version of Android that supports the “Me” contact, which is prominently shown at the top of the list of the new People app. This simplifies use-cases that used to be a multi-tap process in previous versions — for example, sharing personal contact data with another person or “navigating home” in a navigation app. Also it allows applications to directly address the user by name and show their photo.

The “Me” profile is protected by the new permissions READ_PROFILE and WRITE_PROFILE. The new functionality is powerful; READ_PROFILE lets developers access users’ personally identifying information. Please make sure to inform the user on why you require this permission.

The entry point to the new API is ContactsContract.Profile and is available on API version 14+.

Add connection

Previously, connecting with users on a social network involved opening the respective social networking app, searching for the person and then connecting (“Friend”, “Follow” etc.). Ice Cream Sandwich has a much slicker approach: When looking at an existing contact in the People application, the user can decide to add this person to another network as well. For example, the user might want to follow a person on Google+ that they already have as a contact in Gmail.

Once the user taps one of the “Add connection” commands, the app is launched and can look for the person using the information that is already in the contact. Search criteria are up to the app, but good candidates are name, email address or phone number.

To specify your “Add connection” menu item, use the attributes inviteContactActivity and inviteContactActionLabel in your contacts.xml:

<ContactsAccountType
xmlns:android="http://schemas.android.com/apk/res/android"
inviteContactActivity="com.example.activities.InviteContactActivity"
inviteContactActionLabel="@string/invite_action_label">
<!-- Description of your data types -->
</ContactsAccountType>

Be sure to use the same verb as you typically use for adding connections, so that in combination with your app icon the user understands which application is about to be launched.

The “Add connection” functionality is available on API version 14+.

Contact-view notification

High-resolution pictures need a lot of space, and social streams quickly become outdated. It is therefore not a good idea to keep the whole contacts database completely in sync with the social network. A well-written sync adapter should take importance of contacts into account; as an example, starred contacts are shown with big pictures, so high-resolution pictures are more important. Your network might also have its own metrics that can help to identify important contacts.

For all other contacts, you can register to receive a notification which is sent by the People app to all sync adapters that contribute to a contact whenever the contact’s detail page is opened. At that point, you can provide additional information. As an example, when the Google+ sync adapter receives this notification, it pulls in the high-resolution photo and most recent social stream posts for that user and writes them to the contacts provider. This can be achieved by adding the viewContactNotifyService attribute to contacts.xml:

<ContactsAccountType
xmlns:android="http://schemas.android.com/apk/res/android"
viewContactNotifyService="com.example.notifier.NotifierService">
<!-- Description of your data types -->
</ContactsAccountType>

When this Intent is launched, its data field will point to the URI of the raw contact that was opened.

These notifications are available with API version 14+.

Summary

With Ice Cream Sandwich, we improved key areas around high resolution photos and update streams, and simplified the creation of new connections.

Everything outlined in here is done using open APIs that can be implemented by any network that wants to participate. We’re excited to see how developers take advantage of these new features!
Read More..

Wednesday, June 25, 2014

Making Android Games that Play Nice

[This post is by Ian Ni-Lewis, a Developer Advocate who devotes most of his time to making Android games more awesome. — Tim Bray]


Making a game on Android is easy. Making a great game for a mobile, multitasking, often multi-core, multi-purpose system like Android is trickier. Even the best developers frequently make mistakes in the way they interact with the Android system and with other applications
 — mistakes that don’t affect the quality of gameplay, but which affect the quality of the user’s experience in other ways.

A truly great Android game knows how to play nice: how to fit seamlessly into the system of apps, services, and UI features that run on Android devices. In this multi-part series of posts, Android Developer Relations engineers who specialize in games explain what it takes to make your game play nice.

I: The Audio Lifecycle (or, why is there music coming from my pants?)

One of the most awesome things about Android is that it can do so much stuff in the background. But when apps aren’t careful about their background behaviors, it can get annoying. Take my own personal pet peeve: game audio that doesn’t know when to quit.

The problem

I’m on the bus to work, passing the time with a great Android game. I’m completely entranced by whatever combination of birds, ropes, and ninjas is popular this week. Suddenly I panic: I’ve almost missed my stop! I leap up, quickly locking my phone as I shove it into a pocket.

I arrive breathless at my first meeting of the day. The boss, perhaps sensing my vulnerability, asks me a tough question. Not tough enough to stump me, though — I’ve got the answer to that right here on my Android phone! I whip out my phone and press the unlock button... and the room dissolves in laughter as a certain well-known game ditty blares out from the device.

The initial embarrassment is bad enough, but what’s this? I can’t even mute the thing! The phone is showing the lock screen and the volume buttons are inactive. My stress level is climbing and it takes me three tries to successfully type in my unlock code. Finally I get the thing unlocked, jam my finger on the home button and breathe a sigh of relief as the music stops. But the damage is done — my boss is glowering and for the rest of the week my co-workers make video game noises whenever they pass my desk.

What went wrong?

It’s a common mistake: the developer of the game assumed that if the game received an onResume() message, it was safe to resume audio. The problem is that onResume() doesn’t necessarily mean your app is visible — only that it’s active. In the case of a locked phone, onResume() is sent as soon as the screen turns on, even though the phone’s display is on the lock screen and the volume buttons aren’t enabled.

Fixing this is trickier than it sounds. Some games wait for onWindowFocusChanged() instead of onResume(), which works pretty well on Gingerbread. But on Honeycomb and higher, onWindowFocusChanged() is sent when certain foreground windows — like, ironically, the volume control display window — take focus. The result is that when the user changes the volume, all of the sound is muted. Not the developer’s original intent!

Waiting for onResume() and onFocusChanged() seems like a possible fix, and it works pretty well in a large number of cases. But even this approach has its Achilles’ heel. If the device falls asleep on its own, or if the user locks the phone and then immediately unlocks it, your app may not receive any focus changed messages at all.

What to do about it

Here’s the easy two-step way to avoid user embarrassment:

  1. Pause the game (and all sound effects) whenever you receive an onPause() message. When gameplay is interrupted — whether because the phone is locked, or the user received a call, or for some other reason — the game should be paused.


  2. After the game is paused, require user input to continue. The biggest mistake most game developers make is to automatically restart gameplay and audio as soon as the user returns to the game. This isn’t just a question of solving the “music over lock screen” issue. Users like to come back to a paused game. It’s no fun to switch back to a game, only to realize you’re about to die because gameplay has resumed before you expected it.


Some game designers don’t like the idea of pausing the background music when the game is paused. If you absolutely must resume music as soon as your game regains focus, then you should do the following:

  1. Pause playback when you receive onPause().


  2. When you receive onResume():

    1. If you have previously received an onFocusChanged(false) message, wait for an onFocusChanged(true) message to arrive before resuming playback.


    2. If you have not previously received an onFocusChanged(false) message, then resume audio immediately.


  3. Test thoroughly!


Fixing audio embarrassments is almost always a quick and easy process. Take the time to do it right, and your users will thank you.

Read More..

Can I use this Intent

Android offers a very powerful and yet easy to use tool called intents. An intent can be use to turn applications into high-level libraries and make code re-use something even better than before. The Android Home screen and AnyCut use intents extensively to create shortcuts for instance. While it is nice to be able to make use of a loosely coupled API, there is no guarantee that the intent you send will be received by another application. This happens in particular with 3rd party apps, like Panoramio and its RADAR intent.


While working on a new application, I came up with a very simple way to find out whether the system contains any application capable of responding to the intent you want to use. I implemented this technique in my application to gray out the menu item that the user would normally click to trigger the intent. The code is pretty simple and easy to follow:


/**
* Indicates whether the specified action can be used as an intent. This
* method queries the package manager for installed packages that can
* respond to an intent with the specified action. If no suitable package is
* found, this method returns false.
*
* @param context The applications environment.
* @param action The Intent action to check for availability.
*
* @return True if an Intent with the specified action can be sent and
* responded to, false otherwise.
*/
public static boolean isIntentAvailable(Context context, String action) {
final PackageManager packageManager = context.getPackageManager();
final Intent intent = new Intent(action);
List<ResolveInfo> list =
packageManager.queryIntentActivities(intent,
PackageManager.MATCH_DEFAULT_ONLY);
return list.size() > 0;
}

Here is how I use it:


@Override
public boolean onPrepareOptionsMenu(Menu menu) {
final boolean scanAvailable = isIntentAvailable(this,
"com.google.zxing.client.android.SCAN");

MenuItem item;
item = menu.findItem(R.id.menu_item_add);
item.setEnabled(scanAvailable);

return super.onPrepareOptionsMenu(menu);
}

In this example, the menu is grayed out if the Barcode Scanner application is not installed. Another, simpler, way to do this is to catch the ActivityNotFoundException when calling startActivity() but it only lets you react to the problem, you cannot predict it and update the UI accordingly to prevent the user from doing something that wont work. The technique described here can also be used at startup time to ask the user whether hed like to install the missing package, you can then simply redirect him to the Android Market by using the appropriate URI.


Note: this article was originally posted on my personal blog.

Read More..

Now available Android 1 6 NDK

Today Android 1.6 NDK, release 1 is available for download from the Android developer site.

To recap, the NDK is a companion to the SDK that provides tools to generate and embed native ARM machine code within your application packages. This native code has the same restrictions as the VM code, but can execute certain operations much more rapidly. This is useful if youre doing heavy computations, digital processing, or even porting existing code bases written in C or C++.

If you already use the Android 1.5 NDK, upgrading to this release is highly recommended. It provides the following improvements:

  • The ability to use OpenGL ES 1.1 headers and libraries
    If your application targets Android 1.6, your native code can now directly call OpenGL ES 1.1 functions to perform graphics rendering. This will help those programs that need to send large amounts of vertex data to the GPU. Note, however, that activity lifecycle and surface creation must still be performed from the VM. This NDK contains a new sample ("san-angeles") that shows exactly how to do that with a GLSurfaceView object.

  • The ability to target either Android 1.5 or 1.6 devices
    The NDK parses your projects properties to know which platform release it is targeting. It will then automatically use the proper headers and libraries to generate your native code. Any application that targets 1.5 will run on Android 1.5, Android 1.6 and any future official system release. Targeting 1.6 should, thus, only be done if your application requires new 1.6 features / APIs, like the ability to call OpenGL ES 1.x headers from native code.

  • The ability to put your native sources under your applications project tree
    You can now conveniently place all your sources (C, C++ and Java) under the same tree, for editing or version control purposes.

  • Many fixes to the NDKs build scripts
    The changes to the build scripts fix some annoying bugs and also increase host system compatibility.

If you have any questions, please join us in the Android NDK forum.

Read More..

Tuesday, June 24, 2014

RenderScript in the Android Support Library


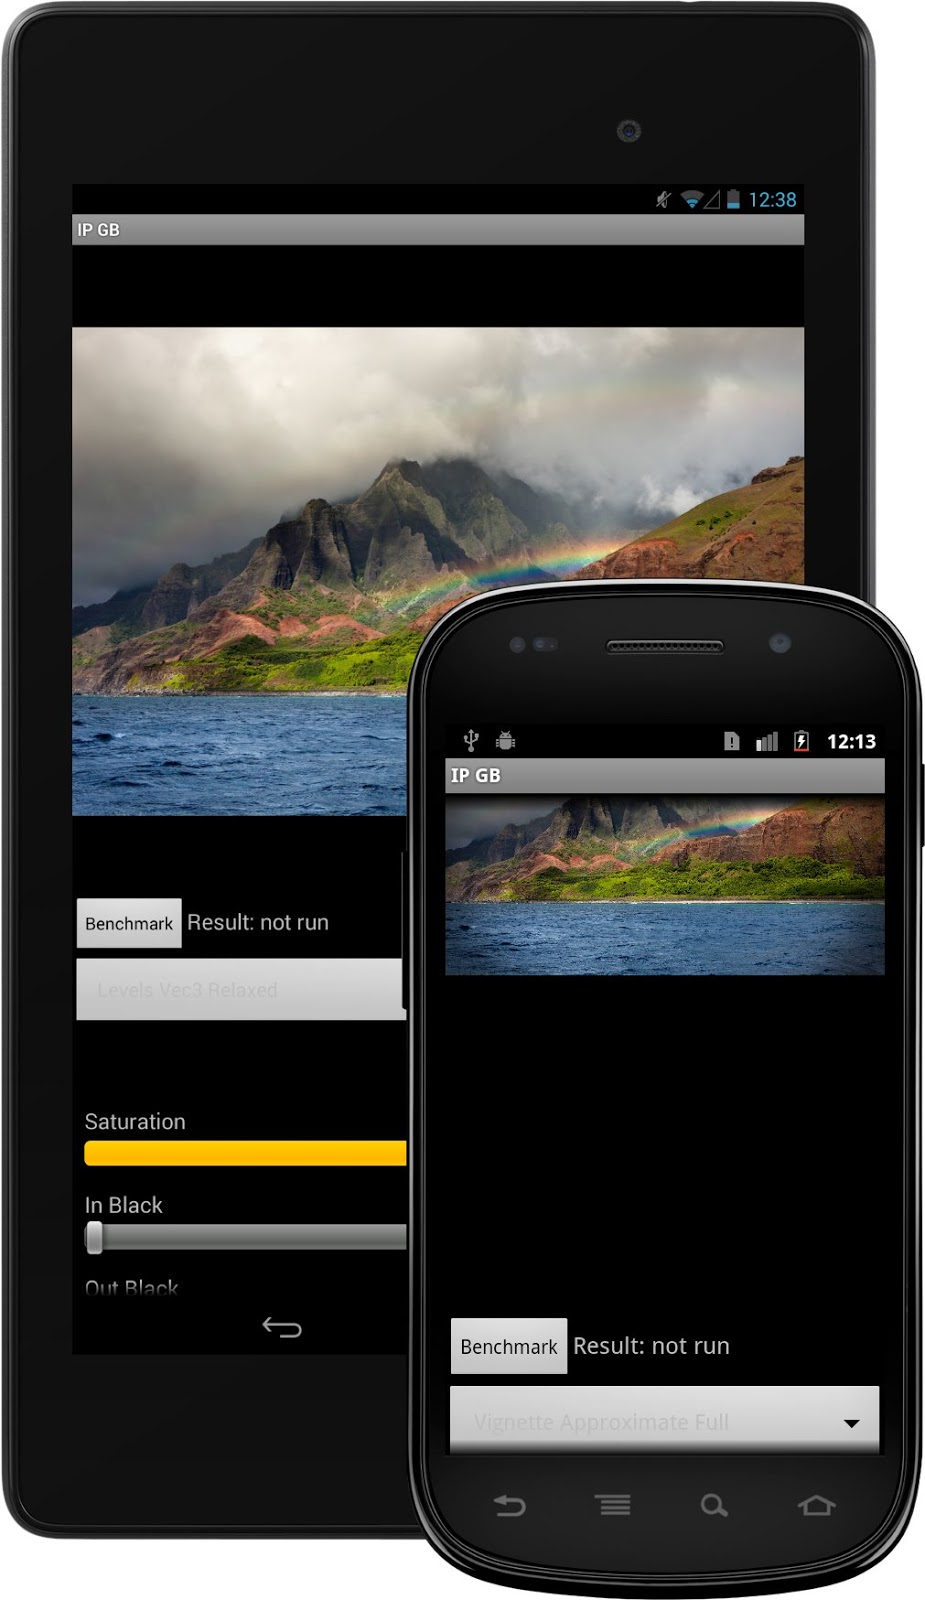
Renderscript Support library on devicesstyle="border-radius: 6px;padding:0;margin:0;" />


The RenderScript Support Library lets you take advantage of the latest RenderScript features on devices running Android 2.2 and later.


Posted by Tim Murray, Android RenderScript team

One of the requests we hear most commonly from developers is to enable more devices to run the latest features of RenderScript. Over the past several releases of Android, we’ve added a ton of functionality to the RenderScript runtime, but the runtimes dependence on the core Android platform version has limited the range of devices that can support that new functionality. We’ve been working on a solution to this since last year, and we’re now ready to share it with all Android developers.


Today were announcing a new RenderScript Support Library and updated SDK tools that together let you take advantage of RenderScript on plaform versions all the way back to Android 2.2 (Froyo).

With ADT v22.2, SDK Tools v22.2, and Android Build Tools v18.1.0, apps targeting Android 2.2 and later can now make use of almost all of the functionality available natively in RenderScript with Android 4.3. This includes access to the newest RenderScript features such as high-performance intrinsics and the new performance optimizations available to scripts.


Using the RenderScript Support Library


Using the RenderScript Support Library is straightforward. Once youve updated ADT and your SDK tools, there are only two things that you have to do to start using Renderscript in your apps:


  1. In your classes that use RenderScript, import the RenderScript Support Library from android.support.v8.renderscript. If you are already using native RenderScript, you can change your import from android.renderscript to android.support.v8.renderscript.

    import android.support.v8.renderscript.*;


  2. In your project.properties, make sure you’re targeting android-18 and add the following lines:

    renderscript.target=18
    renderscript.support.mode=true
    sdk.buildtools=18.1.0


That’s it! With the RenderScript Support Library, you can continue to use the same APIs from your app as with the native RenderScript package (with a few minor exceptions that we’ll talk about below), and you can use the same features in your own scripts as you would with the latest RenderScript toolchain.

For complete details on how to set up the RenderScript Support Library, see Accessing RenderScript Java APIs.


API and Implementation details


If youd like to use RenderScript Support Library in your app, there are few things you should know:


  • First, the RenderScript Support Library supports almost all of the RenderScript API functions as the native API thats available in API level and higher. The one notable exception is that Allocation.USAGE_IO_INPUT and Allocation.USAGE_IO_OUTPUT are not currently available in the RenderScript Support Library.


  • Second, devices running Android 4.2 and earlier will always run their RenderScript applications on the CPU, while devices running Android 4.3 or later will run their RenderScript applications on whatever processors are available on that particular device. Because the Support Library versions of the scripts have to be precompiled to support all possible platforms, there is a performance hit when running the precompiled scripts compared to runtime compilation on Android 4.3 due to more restrictions on compiler optimizations.


We’re really pleased with how the RenderScript Support Library has turned out. Weve already seen how it performs in a shipping app — its been part of the photo editor in the Google+ Android app since May 2013, and it’s definitely proven itself in a large and widely used application. We hope you’ll be happy with it too.


Read More..