Monday, June 30, 2014

New Resources for Developers

Were back in action after a Thanksgiving break filled with turkey, stuffing, and pumpkin pie. Now its the holiday season (at least, here in the U.S.) and were filled with good will toward developers. Today I wanted to talk about a couple things we just finished polishing up.

First, the Android 1.0 SDK, release 2 is now available. Like the previous 1.0_r1 release, this new 1.0_r2 build creates applications that are compatible with Android 1.0 devices, such as the T-Mobile G1. This new release fixes a few bugs. In 1.0_r1, it was possible for developers to write technically-illegal code by using the Java Reflection APIs to access private or protected fields and methods. 1.0_r2 fixes that problem by enforcing private/protected visibility of items accessed via Reflection. Meanwhile, the class android.R.styleable was included in 1.0_r1 primarily for documentation purposes as a way for developers to look up the style attributes available to them to use. However, actually referring to that class via source code would result in applications that might break when run on future versions of the Android platform, so 1.0_r2 corrects the oversight and removes access to the class from the android.jar file. (The class remains in the documentation for reference purposes, though.)

Both of these problems are obscure "future-proofing" issues, and Id be quite surprised if they actually caused problems for anyone, but now theyre fixed. 1.0_r2 also includes a few other smaller changes; check out the release notes for all the details.

Second, many of you have asked if developer devices will be available. Weve worked with our partners to create a program for developers to purchase devices that enable them to test and debug applications more easily.

I think these new tools will be quite helpful to developers, and Im looking forward to seeing what people do with Android, next.

Read More..

Live folders

Live folders have been introduced in Android 1.5 and let you display any source of data on the Home screen without forcing the user to launch an application. A live folder is simply a real-time view of a ContentProvider. As such, a live folder can be used to display all your contacts, your bookmarks, your email, your playlists, an RSS feed, etc. The possibilities are endless! Android 1.5 ships with a few stock live folders to display your contacts. For instance, the screenshot below shows the content of the live folders that displays all my contacts with a phone number:

If a contacts sync happens in the background while Im browsing this live folder, I will see the change happen in real-time. Live folders are not only useful but its also very easy to modify your application to make it provider a live folder. In this article, I will show you how to add a live folder to the Shelves application. You can download its source code and modify it by following my instructions to better understand how live folders work.

To give the user the option to create a new live folder, you first need to create a new activity with an intent filter who action is android.intent.action.CREATE_LIVE_FOLDER. To do so, simply open AndroidManifest.xml and add something similar to this:

<activity
android:name=".activity.BookShelfLiveFolder"
android:label="BookShelf">
<intent-filter>
<action android:name="android.intent.action.CREATE_LIVE_FOLDER" />
<category android:name="android.intent.category.DEFAULT" />
</intent-filter>
</activity>

The label and icon of this activity are what the user will see on the Home screen when choosing a live folder to create:

Since you just need an intent filter, it is possible, and sometimes advised, to reuse an existing activity. In the case of Shelves, we will create a new activity, org.curiouscreature.android.shelves.activity.BookShelfLiveFolder. The role of this activity is to send an Intent result to Home containing the description of the live folder: its name, icon, display mode and content URI. The content URI is very important as it describes what ContentProvider will be used to populate the live folder. The code of the activity is very simple as you can see here:

public class BookShelfLiveFolder extends Activity {
public static final Uri CONTENT_URI = Uri.parse("content://shelves/live_folders/books");

@Override
protected void onCreate(Bundle savedInstanceState) {
super.onCreate(savedInstanceState);

final Intent intent = getIntent();
final String action = intent.getAction();

if (LiveFolders.ACTION_CREATE_LIVE_FOLDER.equals(action)) {
setResult(RESULT_OK, createLiveFolder(this, CONTENT_URI,
"Books", R.drawable.ic_live_folder));
} else {
setResult(RESULT_CANCELED);
}

finish();
}

private static Intent createLiveFolder(Context context, Uri uri, String name, int icon) {
final Intent intent = new Intent();

intent.setData(uri);
intent.putExtra(LiveFolders.EXTRA_LIVE_FOLDER_NAME, name);
intent.putExtra(LiveFolders.EXTRA_LIVE_FOLDER_ICON,
Intent.ShortcutIconResource.fromContext(context, icon));
intent.putExtra(LiveFolders.EXTRA_LIVE_FOLDER_DISPLAY_MODE, LiveFolders.DISPLAY_MODE_LIST);

return intent;
}
}

This activity, when invoked with theACTION_CREATE_LIVE_FOLDER intent, returns an intent with a URI, content://shelves/live_folders/books, and three extras to describe the live folder. There are other extras and constants you can use and you should refer to the documentation of android.provider.LiveFolders for more details. When Home receives this intent, a new live folder is created on the users desktop, with the name and icon you provided. Then, when the user clicks on the live folder to open it, Home queries the content provider referenced by the provided URI.

Live folders content providers must obey specific naming rules. The Cursor returned by the query() method must have at least two columns named LiveFolders._ID and LiveFolders.NAME. The first one is the unique identifier of each item in the live folder and the second one is the name of the item. There are other column names you can use to specify an icon, a description, the intent to associate with the item (fired when the user clicks that item), etc. Again, refer to the documentation of android.provider.LiveFolders for more details.

In our example, all we need to do is modify the existing provider in Shelves called org.curiouscreature.android.shelves.provider.BooksProvider. First, we need to modify the URI_MATCHER to recognize our content://shelves/live_folders/books content URI:

private static final int LIVE_FOLDER_BOOKS = 4;
// ...
URI_MATCHER.addURI(AUTHORITY, "live_folders/books", LIVE_FOLDER_BOOKS);

Then we need to create a new projection map for the cursor. A projection map can be used to "rename" columns. In our case, we will replace BooksStore.Book._ID, BooksStore.Book.TITLE and BooksStore.Book.AUTHORS with LiveFolders._ID, LiveFolders.TITLE and LiveFolders.DESCRIPTION:

private static final HashMap LIVE_FOLDER_PROJECTION_MAP;
static {
LIVE_FOLDER_PROJECTION_MAP = new HashMap();
LIVE_FOLDER_PROJECTION_MAP.put(LiveFolders._ID, BooksStore.Book._ID +
" AS " + LiveFolders._ID);
LIVE_FOLDER_PROJECTION_MAP.put(LiveFolders.NAME, BooksStore.Book.TITLE +
" AS " + LiveFolders.NAME);
LIVE_FOLDER_PROJECTION_MAP.put(LiveFolders.DESCRIPTION, BooksStore.Book.AUTHORS +
" AS " + LiveFolders.DESCRIPTION);
}

Because we are providing a title and a description for each row, Home will automatically display each item of the live folder with two lines of text. Finally, we implement the query() method by supplying our projection map to the SQL query builder:

public Cursor query(Uri uri, String[] projection, String selection,
String[] selectionArgs, String sortOrder) {

SQLiteQueryBuilder qb = new SQLiteQueryBuilder();

switch (URI_MATCHER.match(uri)) {
// ...
case LIVE_FOLDER_BOOKS:
qb.setTables("books");
qb.setProjectionMap(LIVE_FOLDER_PROJECTION_MAP);
break;
default:
throw new IllegalArgumentException("Unknown URI " + uri);
}

SQLiteDatabase db = mOpenHelper.getReadableDatabase();
Cursor c = qb.query(db, projection, selection, selectionArgs, null, null, BooksStore.Book.DEFAULT_SORT_ORDER);
c.setNotificationUri(getContext().getContentResolver(), uri);

return c;
}

You can now compile and deploy the application, go to the Home screen and try to add a live folder. I added a books live folder to my Home screen and when I open it, I can see the list of all of my books, with their titles and authors, and all it took was a few lines of code:

The live folders API is extremely simple and relies only on intents and content URI. If you want to see more examples of live folders implementation, you can read the source code of the Contacts application and of the Contacts provider.

You can also download the result of our exercise, the modified version of Shelves with live folders support.


Learn about Android 1.5 and more at Google I/O. Members of the Android team will be there to give a series of in-depth technical sessions and to field your toughest questions.

Read More..

Android at Mobile World Congress

Im happy to announce that well be hosting a very special Android Developer Lab at Mobile World Congress (MWC) in Barcelona on Wednesday, February 17th as part of the inaugural App Planet event.

There will be technical presentations throughout the day and a developer lounge where you can talk to Android team members and meet others in the growing Android developer community.

Whether you’re already developing Android apps, youre an experienced mobile developer, or you’re considering making your first foray into writing mobile applications, the Android Developer Lab will provide access to the resources you need to create innovative and compelling apps for the Android platform.

Space is limited in the technical sessions, so if youre attending MWC and want to come by the Android Developer Lab, make sure to sign up now.

Also, were offering a limited number of complimentary passes that provide access to the Android Developer Lab, the rest of App Planet, and the general exhibition areas for MWC. Sign up to be considered to receive a pass.

Hope to see you in Barcelona!

Read More..

Sunday, June 29, 2014

ADC 2 Round 2 Voting Open

The results from ADC 2 Round 1 are now tabulated and verified. With the top 200 applications identified, its time to begin the final round judging. Be sure to download the ADC 2 judging application, or update your existing application, and help us select the final winners!

For the final round, both users and a Google-selected panel of industry judges will provide votes to determine the final winners. Prizes will be distributed to the top 3 entrants in each of the 10 categories, and the top 3 overall entrants will receive additional prizes. Please see our reference page for full challenge information.

Your vote is critical! We will keep voting open until we have received sufficient votes for all of the applications. We encourage you to download the ADC 2 judging application and evaluate entrants for yourself.

Download Android Developer Challenge 2:

Read More..

Dalvik JIT

[This post is by Dan Bornstein, virtual-machine wrangler. — Tim Bray]

As the tech lead for the Dalvik team within the Android project, I spend my time working on the virtual machine (VM) and core class libraries that sit beneath the Android application framework. This layer is mostly invisible to end users, but done right, it helps make Android devices run smoothly and improves developer productivity.

The 2.2 release is particularly pleasing to me, as it is the first release since before 1.0 in which we have been able to deliver significantly new VM technology. And unlike much of what my team and I do, it is something that can be experienced directly by end users.

“Dalvik” isn’t exactly a household word (at least in my country), and most people wouldn’t know a virtual machine if it hit them in the face, but when you tell them you were able to make their existing device work better — run faster, use less battery — they will actually take notice!

What Makes This Possible?

We added a Just In Time (JIT) compiler to the Dalvik VM. The JIT is a software component which takes application code, analyzes it, and actively translates it into a form that runs faster, doing so while the application continues to run. If you want to learn more about the design of the Dalvik JIT, please watch the excellent talk from Google I/O 2010 given by my colleagues Bill Buzbee and Ben Cheng, which should be posted to YouTube very soon.

To be clear, the differences aren’t always dramatic, nor do they apply uniformly to all applications. Code that is written to run the CPU all-out can now do more in the same amount of time (running faster), and code that is written to be rate-limited can get its work done using less time and less of the CPU (using less battery). On the performance front in particular, we have seen realistic improvements of 2x to 5x for CPU-bound code, compared to the previous version of the Dalvik VM. This is equivalent to about 4x to 10x faster than a more traditional interpreter implementation.

The team is proud of our new JIT in general, but we are especially proud of two aspects of it:

Many previous JIT implementations react slowly, delivering performance improvements only after a long warm up period. In the extreme, it can be minutes or even hours before the code is fully up to speed. On the other hand, the Dalvik JIT reacts quickly, so that mere moments after you hit the “Start” button on your favorite game, you are already benefiting from the work of the JIT.

We are also very pleased with how little memory the JIT uses. The code for the JIT itself is well under 100k, and each process that the JIT runs in will typically only use another 100k or so of RAM. On the current generation of Android phones, device users won’t even notice this additional memory usage; on my own phone, I can still have literally dozens of applications warmed up in memory and ready to go.

The Dalvik team isn’t resting on its laurels, either. We are hoping to see the Dalvik JIT deployed on many devices in the coming months. Looking forward, the team has an endless list of ideas for making the VM and library code better, which we are diligently working on.

Read More..

Some News from Android Market

Im pleased to let you know about several updates to Android Market. First, we will soon introduce new features in Android Market for Android 1.6 that will improve the overall experience for users. As part of this change, developers will be able to provide screenshots, promotional icons and descriptions that will better show off applications and games.

We have also added four new sub-categories for applications: sports, health, themes, and comics. Developers can now choose these sub-categories for both new and existing applications via the publisher website. Finally, we have added seller support for developers in Italy. Italian developers can go to the publisher website to upload applications and target any of the countries where paid applications are currently available to users.

To take advantage of the upcoming Android Market refresh, we encourage you to visit the Android Market publisher website and upload additional marketing assets. Check out the video below for some of the highlights.

Read More..

Saturday, June 28, 2014

More Carrier Billing Options on Android Market


[This post is by Eric Chu, Android Developer Ecosystem. —Dirk Dougherty]


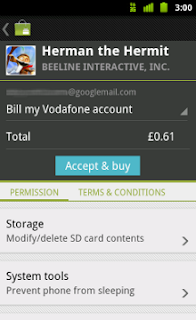
Over the past year, we’ve seen very strong growth in the number of Android users around the world. To make it easier for those users to purchase their favorite apps and games on Android Market, we’re bringing Direct Carrier Billing to additional carrier networks in South Korea, the UK, and Germany.


In South Korea, we’ve begun a phased rollout of the service to users on the top two carrier networks — SK Telecom and KT Corporation. When complete, the rollout will reach more than 10 million users, who will be able to charge their Android Market purchases straight to their phone bills.


In Europe, we’re rolling out the service to users on two popular regional carriers, Vodafone UK and Vodafone DE. Initially, the service will be available only to users who have purchased their devices through Vodafone’s online and retail channels.


The new launches expand the network of carriers already offering direct billing service in the US on the T-Mobile, AT&T, and Sprint networks, and in Japan on SoftBank, KDDI, and NTT DOCOMO networks.


Direct Carrier Billing is a key payment option for users worldwide, especially in regions where credit cards are less common. We will continue to partner with more operators to offer this payment option to their Android users. Watch for more announcements in the weeks ahead.
Read More..

Android Developer Challenge Judges

We have received a few inquiries regarding the judges who will be evaluating entries to the Android Developer Challenge (ADC). All Entries will be judged by a panel of experts in the fields of mobile devices, cellular telecommunications, software development, and/or technology innovation ("Judges"). Google will select the Judges from the member organizations of the Open Handset Alliance, Google and/or mobile experts.

As a reminder, the deadline for the Android Developer Challenge is April 14, 2008. Were really looking forward to seeing what youve created so make sure you submit in time. Good luck!

Read More..

How to have your Cup cake and eat it too

[This post is by Adam Powell, his second touchy-feely outing in just a few weeks. I asked him to send me a better picture than we ran last time, and got this in response. Photo by our own Romain Guy. — Tim Bray]

Android developers concerned with targeting every last device with their apps are no doubt familiar with this chart:

On July 1, 2010 this was the breakdown of active devices running different versions of the Android platform. With all of the new platform features added to the Android SDK in each version, this chart has many developers shouting the F-word when they are forced to choose between integrating newer platform features and providing their app to the widest possible audience.

Savvy Android developers already know that these two options aren’t really mutually exclusive, but that straddling between them can be painful. In this post I’m going to show you that it doesn’t have to be that way.

Several weeks ago we took a look at how to handle multitouch on Android 2.0 (Eclair) and above, and by the end we had a simple demo app. That app uses features exclusive to Android 2.2 (Froyo) which as of this writing hasn’t had a chance to reach many devices yet. In this post we’re going to refactor that demo to run on devices all the way back to Android 1.5 (Cupcake). If you’d like to follow along, start off by grabbing the code in the trunk of the android-touchexample project on Google Code.

The problem manifests

The uses-sdk tag in your AndroidManifest.xml can specify both a minSdkVersion and a targetSdkVersion. You can use this to declare that while your app is prepared to run on an older version of the platform, it knows about newer versions. Your app can now build against newer SDKs. However, if your code accesses newer platform functionality directly you will probably see something like this in the system log of devices running an older version of Android:

E/dalvikvm(  792): Could not find method android.view.MotionEvent.getX, referenced from method com.example.android.touchexample.TouchExampleView.onTouchEvent
W/dalvikvm( 792): VFY: unable to resolve virtual method 17: Landroid/view/MotionEvent;.getX (I)F
W/dalvikvm( 792): VFY: rejecting opcode 0x6e at 0x0006
W/dalvikvm( 792): VFY: rejected Lcom/example/android/touchexample/TouchExampleView;.onTouchEvent (Landroid/view/MotionEvent;)Z
W/dalvikvm( 792): Verifier rejected class Lcom/example/android/touchexample/TouchExampleView;
D/AndroidRuntime( 792): Shutting down VM
W/dalvikvm( 792): threadid=3: thread exiting with uncaught exception (group=0x4000fe70)

We broke the contract of minSdkVersion, and here is the result. When we build our app against SDK 8 (Froyo) but declare minSdkVersion="3" (Cupcake) we promise the system that we know what we’re doing and we won’t try to access anything that doesn’t exist. If we mess this up, we see the above, and our users see an ugly error message.

Cue a lot of frustrated users and one-star ratings on Market. We need a safe way of accessing newer platform functionality without making the verifier angry on older platform versions.

Stop and reflect

Many Android developers are already familiar with the practice of accomplishing this through reflection. Reflection lets your code interface with the runtime, detect when certain methods or classes are present, and invoke or instantiate them without touching them directly.

The prospect of querying each platform feature individually and conditionally invoking it using reflection isn’t pretty. It’s ugly. It’s slow. It’s cumbersome. Most of all, heavy use can turn your app’s codebase into an unmaintainable mess. What if I said there is a way to write Android apps that target Android 1.5 (Cupcake) through 2.2 (Froyo) and beyond with a single codebase and no reflection at all?

Lazy Loading

Computer science researcher Bill Pugh published and popularized a method of writing singletons in Java that takes advantage of the laziness of ClassLoaders. Wikipedia explains his solution further. The code looks like this:

public class Singleton {
// Private constructor prevents instantiation from other classes
private Singleton() {}

/**
* SingletonHolder is loaded on the first execution of Singleton.getInstance()
* or the first access to SingletonHolder.INSTANCE, not before.
*/
private static class SingletonHolder {
private static final Singleton INSTANCE = new Singleton();
}

public static Singleton getInstance() {
return SingletonHolder.INSTANCE;
}
}

There is a very important guaranteed behavior at work here explained by the comment above SingletonHolder. Java classes are loaded and initialized on first access - instantiating the class or accessing one of its static fields or methods for the first time. This is relevant to us because classes are verified by the VM when they are loaded, not before. We now have everything we need to write Android apps that span versions without reflection.

Designing for compatibility

As it turns out this is fairly simple to apply. You generally will want your app to degrade gracefully on older platform versions, dropping features or providing alternate functionality when the platform support isn’t available. Since Android platform features are tied to the API level you have only one axis to consider when designing for compatibility.

In most cases this version support can be expressed as a simple class hierarchy. You can design your app to access version-sensitive functionality through a version-independent interface or abstract class. Subclasses of that interface intended to run on newer platform versions will support newer platform features, and subclasses intended for older versions might need to present alternate ways for your users to access app functionality.

Your app can use a factory method, abstract factory, or other object creation pattern to instantiate the proper subclass at runtime based on the information exposed by android.os.Build.VERSION. This last step insures that the system will never attempt to load a class it can’t verify, preserving compatibility.

The principle in practice

At the beginning of this post I said that we are going to refactor the touch example app from Making Sense of Multitouch to be compatible from API level 3 (Cupcake) on through API level 8 (Froyo). In that post I pointed out that GestureDetectors can be a useful pattern for abstracting the processing of touch events. At the time I didn’t realize how soon that statement would be put to the test. We can refactor the version-specific elements of the demo app’s touch handling into an abstract GestureDetector.

Before we begin the real work, we need to change our manifest to declare that we support API level 3 devices with minSdkVersion in the uses-sdk tag. Keep in mind that we’re still targeting SDK 8, both with targetSdkVersion in our manifest and in our project configuration. Our manifest now looks like this:

<?xml version="1.0" encoding="utf-8"?>
<manifest xmlns:android="http://schemas.android.com/apk/res/android"
package="com.example.android.touchexample"
android:versionCode="1"
android:versionName="1.0">
<application android:icon="@drawable/icon" android:label="@string/app_name">
<activity android:name=".TouchExampleActivity"
android:label="@string/app_name">
<intent-filter>
<action android:name="android.intent.action.MAIN" />
<category android:name="android.intent.category.LAUNCHER" />
</intent-filter>
</activity>
</application>
<uses-sdk android:minSdkVersion="3" android:targetSdkVersion="8" />
</manifest>

Our TouchExampleView class isn’t compatible with Android versions prior to Froyo thanks to its use of ScaleGestureDetector, and it isn’t compatible with versions prior to Eclair thanks to its use of the newer MotionEvent methods that return multitouch data. We need to abstract that functionality out into classes that will not be loaded on versions of the platform that don’t support it. To do this, we will create the abstract class VersionedGestureDetector.

The example app allows the user to perform two gestures, drag and scale. VersionedGestureDetector will therefore publish two events to an attached listener, onDrag and onScale. TouchExampleView will obtain a VersionedGestureDetector instance appropriate to the platform version, filter incoming touch events through it, and respond to the resulting onDrag and onScale events accordingly.

The first pass of VersionedGestureDetector looks like this:

public abstract class VersionedGestureDetector {
OnGestureListener mListener;

public abstract boolean onTouchEvent(MotionEvent ev);

public interface OnGestureListener {
public void onDrag(float dx, float dy);
public void onScale(float scaleFactor);
}
}

We’ll start with the simplest functionality first, the VersionedGestureDetector for Cupcake. For simplicity’s sake in this example we will implement each version as a private static inner class of VersionedGestureDetector. You can organize this however you please, of course, as long as you use the lazy loading technique shown above or some equivalent. Don’t touch any class that directly accesses functionality not supported by your platform version.

private static class CupcakeDetector extends VersionedGestureDetector {
float mLastTouchX;
float mLastTouchY;

@Override
public boolean onTouchEvent(MotionEvent ev) {
switch (ev.getAction()) {
case MotionEvent.ACTION_DOWN: {
mLastTouchX = ev.getX();
mLastTouchY = ev.getY();
break;
}
case MotionEvent.ACTION_MOVE: {
final float x = ev.getX();
final float y = ev.getY();

mListener.onDrag(x - mLastTouchX, y - mLastTouchY);

mLastTouchX = x;
mLastTouchY = y;
break;
}
}
return true;
}
}

This simple implementation dispatches onDrag events whenever a pointer is dragged across the touchscreen. The values it passes are the X and Y distances traveled by the pointer.

In Eclair and later we will need to properly track pointer IDs during drags so that our draggable object doesn’t jump around as extra pointers enter and leave the touchscreen. The base implementation of onTouchEvent in CupcakeDetector can handle drag events for us with a few tweaks. We’ll add the methods getActiveX and getActiveY to fetch the appropriate touch coordinates and override them in EclairDetector to get the coordinates from the correct pointer:

private static class CupcakeDetector extends VersionedGestureDetector {
float mLastTouchX;
float mLastTouchY;

float getActiveX(MotionEvent ev) {
return ev.getX();
}

float getActiveY(MotionEvent ev) {
return ev.getY();
}

@Override
public boolean onTouchEvent(MotionEvent ev) {
switch (ev.getAction()) {
case MotionEvent.ACTION_DOWN: {
mLastTouchX = getActiveX(ev);
mLastTouchY = getActiveY(ev);
break;
}
case MotionEvent.ACTION_MOVE: {
final float x = getActiveX(ev);
final float y = getActiveY(ev);

mListener.onDrag(x - mLastTouchX, y - mLastTouchY);

mLastTouchX = x;
mLastTouchY = y;
break;
}
}
return true;
}
}

And now EclairDetector, overriding the new getActiveX and getActiveY methods. Most of this code should be familiar from the original touch example:

private static class EclairDetector extends CupcakeDetector {
private static final int INVALID_POINTER_ID = -1;
private int mActivePointerId = INVALID_POINTER_ID;
private int mActivePointerIndex = 0;

@Override
float getActiveX(MotionEvent ev) {
return ev.getX(mActivePointerIndex);
}

@Override
float getActiveY(MotionEvent ev) {
return ev.getY(mActivePointerIndex);
}

@Override
public boolean onTouchEvent(MotionEvent ev) {
final int action = ev.getAction();
switch (action & MotionEvent.ACTION_MASK) {
case MotionEvent.ACTION_DOWN:
mActivePointerId = ev.getPointerId(0);
break;
case MotionEvent.ACTION_CANCEL:
case MotionEvent.ACTION_UP:
mActivePointerId = INVALID_POINTER_ID;
break;
case MotionEvent.ACTION_POINTER_UP:
final int pointerIndex = (ev.getAction() & MotionEvent.ACTION_POINTER_INDEX_MASK)
>> MotionEvent.ACTION_POINTER_INDEX_SHIFT;
final int pointerId = ev.getPointerId(pointerIndex);
if (pointerId == mActivePointerId) {
// This was our active pointer going up. Choose a new
// active pointer and adjust accordingly.
final int newPointerIndex = pointerIndex == 0 ? 1 : 0;
mActivePointerId = ev.getPointerId(newPointerIndex);
mLastTouchX = ev.getX(newPointerIndex);
mLastTouchY = ev.getY(newPointerIndex);
}
break;
}

mActivePointerIndex = ev.findPointerIndex(mActivePointerId);
return super.onTouchEvent(ev);
}
}

EclairDetector calls super.onTouchEvent after determining the active pointer index and lets CupcakeDetector take care of dispatching the drag event. Supporting multiple platform versions doesn’t have to mean code duplication.

Finally, let’s add scale gesture support for Froyo devices that have ScaleGestureDetector. We’ll need a couple more changes to CupcakeDetector first; we don’t want to drag normally while scaling. Some devices have touchscreens that don’t deal well with it, and we would want to handle it differently on devices that do anyway. We’ll add a shouldDrag method to CupcakeDetector that we’ll check before dispatching onDrag events.

The final CupcakeDetector:

private static class CupcakeDetector extends VersionedGestureDetector {
float mLastTouchX;
float mLastTouchY;

float getActiveX(MotionEvent ev) {
return ev.getX();
}

float getActiveY(MotionEvent ev) {
return ev.getY();
}

boolean shouldDrag() {
return true;
}

@Override
public boolean onTouchEvent(MotionEvent ev) {
switch (ev.getAction()) {
case MotionEvent.ACTION_DOWN: {
mLastTouchX = getActiveX(ev);
mLastTouchY = getActiveY(ev);
break;
}
case MotionEvent.ACTION_MOVE: {
final float x = getActiveX(ev);
final float y = getActiveY(ev);

if (shouldDrag()) {
mListener.onDrag(x - mLastTouchX, y - mLastTouchY);
}

mLastTouchX = x;
mLastTouchY = y;
break;
}
}
return true;
}
}

EclairDetector remains unchanged. FroyoDetector is below. shouldDrag will return true as long as we do not have a scale gesture in progress:

private static class FroyoDetector extends EclairDetector {
private ScaleGestureDetector mDetector;

public FroyoDetector(Context context) {
mDetector = new ScaleGestureDetector(context,
new ScaleGestureDetector.SimpleOnScaleGestureListener() {
@Override public boolean onScale(ScaleGestureDetector detector) {
mListener.onScale(detector.getScaleFactor());
return true;
}
});
}

@Override
boolean shouldDrag() {
return !mDetector.isInProgress();
}

@Override
public boolean onTouchEvent(MotionEvent ev) {
mDetector.onTouchEvent(ev);
return super.onTouchEvent(ev);
}
}

Now that we have our detector implementations in order we need a way to create them. Let’s add a factory method to VersionedGestureDetector:

public static VersionedGestureDetector newInstance(Context context,
OnGestureListener listener) {
final int sdkVersion = Integer.parseInt(Build.VERSION.SDK);
VersionedGestureDetector detector = null;
if (sdkVersion < Build.VERSION_CODES.ECLAIR) {
detector = new CupcakeDetector();
} else if (sdkVersion < Build.VERSION_CODES.FROYO) {
detector = new EclairDetector();
} else {
detector = new FroyoDetector(context);
}

detector.mListener = listener;

return detector;
}

Since we’re targeting Cupcake, we don’t have access to Build.VERSION.SDK_INT yet. We have to parse the now-deprecated Build.VERSION.SDK instead. But why is accessing Build.VERSION_CODES.ECLAIR and Build.VERSION_CODES.FROYO safe? As primitive static final int constants, these are inlined by the compiler at build time.

Our VersionedGestureDetector is ready. Now we just need to hook it up to TouchExampleView, which has become considerably shorter:

public class TouchExampleView extends View {
private Drawable mIcon;
private float mPosX;
private float mPosY;

private VersionedGestureDetector mDetector;
private float mScaleFactor = 1.f;

public TouchExampleView(Context context) {
this(context, null, 0);
}

public TouchExampleView(Context context, AttributeSet attrs) {
this(context, attrs, 0);
}

public TouchExampleView(Context context, AttributeSet attrs, int defStyle) {
super(context, attrs, defStyle);
mIcon = context.getResources().getDrawable(R.drawable.icon);
mIcon.setBounds(0, 0, mIcon.getIntrinsicWidth(), mIcon.getIntrinsicHeight());

mDetector = VersionedGestureDetector.newInstance(context, new GestureCallback());
}

@Override
public boolean onTouchEvent(MotionEvent ev) {
mDetector.onTouchEvent(ev);
return true;
}

@Override
public void onDraw(Canvas canvas) {
super.onDraw(canvas);

canvas.save();
canvas.translate(mPosX, mPosY);
canvas.scale(mScaleFactor, mScaleFactor);
mIcon.draw(canvas);
canvas.restore();
}

private class GestureCallback implements VersionedGestureDetector.OnGestureListener {
public void onDrag(float dx, float dy) {
mPosX += dx;
mPosY += dy;
invalidate();
}

public void onScale(float scaleFactor) {
mScaleFactor *= scaleFactor;

// Dont let the object get too small or too large.
mScaleFactor = Math.max(0.1f, Math.min(mScaleFactor, 5.0f));

invalidate();
}
}
}

Wrapping up

We’ve now adapted the touch example app to work from Android 1.5 on through the latest and greatest, taking advantage of newer platform features as available without a single reflective call. The same principles shown here can apply to any new Android feature that you want to use while still allowing your app to run on older platform versions:

  • The ClassLoader loads classes lazily and will only load and verify classes on first access.

  • Factor out app functionality that can differ between platform versions with a version-independent interface or abstract class.

  • Instantiate a version-dependent implementation of it based on the platform version detected at runtime. This keeps the ClassLoader from ever touching a class that it will not be able to verify.

To see the final cross-version touch example app, check out the “cupcake” branch of the android-touchexample project on Google Code.

Extra Credit

In this example we didn’t provide another way for pre-Froyo users to zoom since ScaleGestureDetector was only added as a public API for 2.2. For a real app we would want to offer some alternate affordance to users. Traditionally Android offers a set of small tappable zoom buttons along the bottom of the screen. The ZoomControls and ZoomButtonsController classes in the framework can help you present these controls to the user in a standard way. Implementing this is left as an exercise for the reader.

Read More..

Friday, June 27, 2014

Future Proofing Your App

[This post is by Reto Meier AKA @retomeier, who wrote the book on Android App development. — Tim Bray]

As a developer, I’m excited by Android’s potential as a single development platform that can make my apps available on a wide range of devices. From smartphones to televisions, Android is now being used on an increasingly diverse collection of hardware.

Last year’s Android SDK 1.6 release was the first to introduce support for variations in device hardware, paving the way for devices like the HTC Tattoo — a small screen device with a non-autofocus camera. Future devices, like Google TV, may not include some of the hardware features that we now expect, such a accelerometers and telephony.

We all want our apps available on as many devices as possible, but on some hardware they might just not make sense, so it’s important that apps are available only on the devices where they do.

Android Market Rule #1: Dont let existing applications break on new devices

As curators of the Android Market, one of our most important responsibilities is ensuring consumers and developers can trust the Market to only deliver applications to devices capable of running them.

The Android SDK includes built-in support for specifying which hardware features your application needs, ensuring that when we see more hardware variations, the Market will make sure your apps are available everywhere (and only where) they make sense.

Specify the hardware your app needs using the application Manifest

That includes the target and minimum SDK versions, supported screen sizes, and the required hardware features without which your app will “break”. You can specify the hardware features your app requires by adding a uses-feature node to your manifest.

<uses-feature android:name="android.hardware.microphone" />

By updating your manifest now to include all the hardware features you require, you effectively opt out of future hardware that won’t be capable of properly supporting your app.

Android Market Rule #2: Dont let existing applications break on new devices

In extreme cases — such as the introduction of small screen sizes in Android 1.6 — developers will be required to explicitly opt in their apps before they will be made visible in the Market on these new devices.

In other cases the Android Market will analyze the permissions requested by an app to determine if it implies a dependence on any particular hardware. For example, requiring the CALL_PHONE permission strongly implies the need for telephony hardware.

Until we provide a more convenient tool, you can use AAPT in the SDK to analyze your apps (2.2 SDK required) and see which device requirements are being implicitly added to your application:

aapt dump badging myApp.apk

Where your app uses a particular hardware feature, but you know (and have tested) that it will still work without it, you can specify it as optional by setting the required attribute to false.

<uses-feature android:name="android.hardware.telephony" android:required="false" />

Ensure your application manifest correctly identifies what hardware your app needs, and what is optional

With the uses-feature name strings now available, you can ensure right now that your app appears in the Market, where appropriate, on current and future hardware devices rather than waiting for the devices to be released.

Its in your interest as a developer to ensure your apps work well, and are available, on as many devices as possible and appropriate. Now is the time to test your applications and update your Manifest to opt in to all hardware configurations which you support, and opt out of those that don’t make sense.

Read More..

Android 4 4 KitKat and Updated Developer Tools

Posted by Dave Burke, Engineering Director, Android Platform


Today we are announcing Android 4.4 KitKat, a new version of Android that brings great new features for users and developers.


The very first device to run Android 4.4 is the new Nexus 5, available today on Google Play, and coming soon to other retail outlets. We’ll also be rolling out the Android 4.4 update worldwide in the next few weeks to all Nexus 4, Nexus 7, and Nexus 10 devices, as well as the Samsung Galaxy S4 and HTC One Google Play Edition devices.


As part of this release, we kicked off Project Svelte, an effort to reduce the memory needs of Android so that it can run on a much broader range of devices, including entry-level devices that have as little as 512MB RAM. From the kernel to system, frameworks, and apps, weve reduced memory footprint and improved memory management so Android can run comfortably on only 512MB of RAM. We did this not only on Android but across Google apps, like Chrome and YouTube.


By supporting a broader range of devices, Android 4.4 will help move the Android ecosystem forward. Now all users will be able to enjoy the very best that Android has to offer, on the devices that best meet their needs.


Here’s a quick look at some of the new features for developers:


  • New ways to create beautiful apps — A new full-screen immersive mode lets your app or game use every pixel on the screen to showcase content and capture touch events. A new transitions framework makes it easier to animate the states in your UI. Web content can take advantage of a completely new implementation of WebView built on Chromium.


  • More useful than ever — A printing framework lets you add the convenience of printing to your apps. A storage access framework makes it easier for users find documents, photos, and other data across their local and cloud-based storage services. You can integrate your app or storage service with the framework to give users instant access to their data.


  • Low-power sensors — New hardware-integrated sensors let you add great new features to your apps without draining the battery. Included are a step detector and step counter that let you efficiently track of the number of walking steps, even when the screen is off.


  • New media capabilities — A new screen recorder lets you capture high-quality video of your app directly from your Android device. Its a great new way to create walkthroughs, tutorials, marketing videos, and more. Apps can use adaptive playback to offer a significantly better streaming video experience.


  • RenderScript in the NDK — A new C++ API in the Android Native Development Kit (NDK) lets you use RenderScript from your native code, with access to script intrinsics, custom kernels, and more.


  • Improved accessibility support — New system-wide captioning settings let your apps present closed captions in the style thats preferred by the user.


Theres a lot more, so be sure to check out the Android 4.4 platform highlights for a complete overview of those and other new capabilities for developers. For details on the APIs and how to use them, take a look at the API Overview or watch one of the new DevBytes videos on KitKat.


Along with the new Android 4.4 platform were releasing a new version of the Android NDK (r9b). The new NDK gives you native access to RenderScript and other stable APIs in Android 4.4, so if youve been waiting to use RenderScript from your native code, give it a try.


Last, weve updated the Support Package (r19) with a new helper library for printing images through the new printing framework, as well as other updates.


You can get started developing and testing on Android 4.4 right away, in Android Studio or in ADT/Ant. You can download the Android 4.4 Platform (API level 19), as well as the SDK Tools, Platform Tools, and Support Package from the Android SDK Manager.


Read More..

Future Proofing Your Apps

Hi, developers! I hope youve heard about the early-look version of the Android 1.5 SDK that we recently released. There are some great new features in there, but dont get too excited yet -- some of you will need to fix some problems in your apps before you can start taking advantage of Android 1.5.

Weve done some fairly extensive testing of the popular apps on the Android Market, and it turns out that a few of those apps use some bad techniques that cause them to crash or behave strangely on Android 1.5. The list below is based on our observations of five ways that weve seen bad apps fail on 1.5. You can think of these as "anti-patterns" (that is, techniques to avoid) for Android development. If youve written an app with the Android 1.0 or 1.1 SDKs, youll need to pay close attention.

Technique to Avoid, #1: Using Internal APIs

Even though weve always strongly advised against doing so, some developers have chosen to use unsupported or internal APIs. For instance, many developers are using the internal brightness control and bluetooth toggle APIs that were present in 1.0 and 1.1. A bug -- which is now fixed in Android 1.5 -- allowed apps to use those APIs without requesting permission. As a result, apps that use those APIs will break on 1.5. There are other changes to unsupported APIs in 1.5 besides these, so if youve used internal APIs in your apps, you need to update your apps to stop doing so. Even if they dont break on Android 1.5, theres a good chance they will on some later version. (Theres some good news, though: because "flashlight" apps are so popular, weve added the "screenBrightness" field on the WindowManager.LayoutParams class just for that use case.)

Technique to Avoid, #2: Directly Manipulating Settings

Okay, strictly speaking this one isnt evil, since this is a change in behavior that we made to Android itself. But we made it because some developers were doing naughty things: a number of apps were changing system settings silently without even notifying the user. For instance, some apps turn on GPS without asking the user, and others might turn on data roaming.

As a result, applications can no longer directly manipulate the values of certain system Settings, even if they previously had permission to do so. For instance, apps can no longer directly turn on or off GPS. These apps wont crash, but the APIs in question now have no effect, and do nothing. Instead, apps will need to issue an Intent to launch the appropriate Settings configuration screen, so that the user can change these settings manually. For details, see the android.provider.Settings.Secure class, which you can find in the 1.5_pre SDK documentation (and later). Note that only Settings that were moved to the Settings.Secure class are affected. Other, less sensitive, settings will continue to have the same behavior as in Android 1.1.

Technique to Avoid, #3: Going Overboard with Layouts

Due to changes in the View rendering infrastructure, unreasonably deep (more than 10 or so) or broad (more than 30 total) View hierarchies in layouts are now likely to cause crashes. This was always a risk for excessively complex layouts, but you can think of Android 1.5 as being better than 1.1 at exposing this problem. Most developers wont need to worry about this, but if your app has very complicated layouts, youll need to put it on a diet. You can simplify your layouts using the more advanced layout classes like FrameLayout and TableLayout.

Technique to Avoid, #4: Bad Hardware Assumptions

Android 1.5 includes support for soft keyboards, and there will soon be many devices that run Android but do not have physical keyboards. If your application assumes the presence of a physical keyboard (such as if you have created a custom View that sinks keypress events) you should make sure it degrades gracefully on devices that only have soft keyboards. For more information on this, keep on eye on this blog as well be posting more detailed information about handling the new soft keyboards.

Technique to Avoid, #5: Incautious Rotations

Devices running Android 1.5 and later can automatically rotate the screen, depending on how the user orients the device. Some 1.5 devices will do this by default, and on all others it can be turned on by the user. This can sometimes result in unpredictable behavior from applications that do their own reorientations (whether using the accelerometer, or something else.) This often happens when applications assume that the screen can only rotate if the physical keyboard is exposed; if the device lacks a physical keyboard, these apps do not expect to be reoriented, which is a coding error. Developers should be sure that their applications can gracefully handle being reoriented at any time.

Also, apps that use the accelerometer directly to reorient themselves sometimes compete with the system doing the same thing, with odd results. And finally, some apps that use the accelerometer to detect things like shaking motions and that dont lock their orientation to portrait or landscape, often end up flipping back and forth between orientations. This can be irritating to the user. (You can lock your apps orientation to portrait or landscape using the android:screenOrientation attribute in your AndroidManifest.xml.)

Have any of your apps used one of these dubious techniques? If so, break out your IDE, duct tape, and spackle, and patch em up. Im pretty excited by the new features in the Android 1.5 SDK, and I look forward to seeing your apps on my own 1.5-equipped phone -- but I cant, if they wont run! Fortunately, the fixes for these are pretty simple, and you can start fixing all of the above even with the 1.1_r1 SDK release.

By the way, if youd like to fully immerse yourself in Android 1.5, join us at Google I/O! Its my pleasure to shamelessly plug an event thats shaping up to be the Android developer event of the year. Weve added two more sessions—one on multimedia jujitsu, and a particularly interesting session on the Eyes-Free Android project—with even more yet to come. I thought Google I/O was a pretty killer event last year, and this years looking even better, especially in terms of Android content.

I hope to meet many of you there, but either way, Happy Coding!

Read More..

Thursday, June 26, 2014

Google Play services 4 3

gps

Google Play services 4.3 has now been rolled out to the world, and it contains a number of features you can use to improve your apps. Specifically, this version adds some new members to the Google Play services family: Google Analytics API, Tag Manager, and the Address API. We’ve also made some great enhancements to the existing APIs; everything to make sure you stay on top of the app game out there.


Here are the highlights of the 4.3 release.


Google Analytics and Google Tag Manager

The Analytics API and Google Tag Manager has existed for Android for some time as standalone technologies, but with this release we are incorporating them as first class citizens in Google Play services. Those of you that are used to the API will find it very similar to previous versions, and if you have not used it before we strongly encourage you to take a look at it.

Google Analytics allows you to get detailed statistics on how you app is being used by your users, for example what functionality of your app is being used the most, or which activity triggers users to convert from an advertised version of an app to paid one. Google Tag Manager lets you change characteristics of your app on-the-fly, for example colors, without having to push an update from Google Play.


Google Play Games services Update

The furious speed of innovation in Android mobile gaming has not slowed down and neither have we when it comes to packing the Google Play Game services API with features.

With this release, we are introducing game gifts, which allows players to send virtual in-game requests to anyone in their Google+ circles or through player search. Using this feature, the player can send a wish request to ask another player for an in-game item or benefit, or a gift request to grant an item or benefit to another player.

This is a great way for a game to be more engaging by increasing cross player collaboration and social connections. We are therefore glad to add this functionality as an inherent part of the Games API, it is an much-wanted extension to the multi-player functionality included a couple of releases ago. For more information, see: Unlocking the power of Google for your games.


Drive API

The Google Drive for Android API was just recently added as a member of the Google Play services API family. This release adds a number of important features:

  • Pinning - You can now pin files that should be kept up to date locally, ensuring that it is available when the user is offline. This is great for users that need to use your app with limited or no connectivity


  • App Folders - An app often needs to create files which are not visible to the user, for example to store temporary files in a photo editor. This can now be done using App Folders, a feature is analogous to Application Data Folders in the Google Drive API


  • Change Notifications - You can now register a callback to receive notifications when a file or folder is changed. This mean you no longer need to query Drive continuously to check if the data has changed, just put a change notification on it


In addition to the above, weve also added the ability to access a number of new metadata fields.


Address API

This release will also includes a new Address API, which allows developers to request access to addresses for example to fill out a delivery address form. The kicker is the convenience for the user; a user interface component is presented where they select the desired address, and bang, the entire form is filled out. Developers have been relying on Location data which works very well, but this API shall cater for cases where the Location data is either not accurate or the user actually wants to use a different address than their current physical location. This should sound great to anyone who has done any online shopping during the last decade or so.


That’s it for this time. Now go to work and incorporate these new features to make your apps even better!

And stay tuned for future updates.


For the release video, please see:

DevBytes: Google Play Services 4.3


For details on the APIs, please see:

Google Analytics

Google Tag Manager

Google Play Games services Gifts

Google Drive Android API - Change Events

Google Drive Android API - Pinning

Google Drive Android API - App Folder

Address API


Read More..

Apps that work together

Android applications can easily be linked together using intents. One example of this involves Shazam, MySpace, and the Amazon MP3 Store. Once Shazam has identified a song, you can also search for the artists official MySpace profile page or buy the song via via the Amazon MP3 app. Here, the three developers behind these apps talk about how they accomplished this:

To hear more about how the MySpace app for Android was built and lessons learned, watch Matt Kanninen:

Tomasz Zawada of Shazam also talks about his opinions on the Android platform and has some tips for developers building Android apps:

These and the other Android app developer videos can be found here.

Read More..

New Social APIs in Android ICS

[This post is by Daniel Lehmann, Tech Lead on the Android Apps team. — Tim Bray]

[We’re trying something new; There’s a post over on Google+ where we’ll host a discussion of this article. Daniel Lehmann has agreed to drop by and participate. Come on over and join in!]

With Android Ice Cream Sandwich, we set out to build software that supports emotional connections between humans and the devices they carry. We wanted to build the most personal device that the user has ever owned.

The first ingredient in our recipe is to show users the people that they care about most in a magazine-like way. High-resolution photos replace simple lists of text.

The second ingredient is to more prominently visualize their friends’ activities. We show updates from multiple sources wherever a contact is displayed, without the need to open each social networking app individually.

Android is an open platform, and in Ice Cream Sandwich we provide a rich new API to allow any social networking application to integrate with the system. This post explains how apps like Google+ use these APIs, and how other social networks can do the same.

A few basics

Since Eclair (Android 2.0), the system has been able to join contacts from different sources. Android can notice if you are connected to the same person and different networks, and join those into aggregate contacts.

Essential terms to understand throughout the remainder of this post are:

  • RawContact is a contact as it exists in one source, for example a friend in Skype.

  • Data rows exists for each piece of information that the raw contact contains (name, phone number, email address, etc.).

  • A Contact joins multiple raw contacts into one aggregate. This is what the user perceives as a real contact in the People and Phone apps.

  • A sync adapter synchronizes its raw contacts with its cloud source. It can be bundled with a Market application (examples: Skype, Twitter, Google+).

While users deal with contacts, sync adapters work with their raw contact rows. They own the data inside a raw contact, but by design it is left up to Android to properly join raw contact rows with others.

Contacts sync adapters have a special xml file that describes their content, which is documented in the Android SDK. In the following paragraphs, we’ll assume this file is named contacts.xml.

The Android SDK also contains the application SampleSyncAdapter (and its source code) that implements everything mentioned in here in an easy to understand way.

High resolution photos

In Android versions prior to Honeycomb (3.0), contact photos used to be 96x96. Starting with ICS, they now have a thumbnail (which is the 96x96 version) and a display photo. The display photo’s maximum size can vary from device to device (On Galaxy Nexus and Nexus S, it is currently configured to be 256x256, but expect this to vary with future devices). The size as configured can be queried like this:

private static int getPhotoPickSize(Context context) {
// Note that this URI is safe to call on the UI thread.
Cursor c = context.getContentResolver().query(DisplayPhoto.CONTENT_MAX_DIMENSIONS_URI,
new String[]{ DisplayPhoto.DISPLAY_MAX_DIM }, null, null, null);
try {
c.moveToFirst();
return c.getInt(0);
} finally {
c.close();
}
}

This value is useful if you need to query the picture from the server (as you can specify the right size for the download). If you already have a high resolution picture, there is no need for any resizing on your side; if it is too big, the contacts provider will downsample it automatically.

Up until now, pictures were written using a ContentValues object, just like all the other data rows of the raw contact. While this approach is still supported, it might fail when used with bigger pictures, as there is a size limit when sending ContentValues across process boundaries. The prefered way now is to use an AssetFileDescriptor and write them using a FileOutputStream instead:

private static void saveBitmapToRawContact(Context context, long rawContactId, byte[] photo) throws IOException {
Uri rawContactUri = ContentUris.withAppendedId(RawContacts.CONTENT_URI, rawContactId);
Uri outputFileUri =
Uri.withAppendedPath(rawContactUri, RawContacts.DisplayPhoto.CONTENT_DIRECTORY);
AssetFileDescriptor descriptor = context.getContentResolver().openAssetFileDescriptor(
outputFileUri, "rw");
FileOutputStream stream = descriptor.createOutputStream();
try {
stream.write(photo);
} finally {
stream.close();
descriptor.close();
}
}

For best results, store uncompressed square photos and let the contacts provider take care of compressing the photo. It will create both a thumbnail and a display photo as necessary.

This API is available on API version 14+. For older versions, we recommend to fallback to the old method using ContentValues and assuming a constant size of 96x96.

Update streams

The API for update streams is the biggest new addition for contacts in Ice Cream Sandwich. Sync adapters can now enrich their contact data by providing a social stream that includes text and photos.

This API is intended to provide an entry point into your social app to increase user engagement. We chose to only surface the most recent few stream items, as we believe that your social app will always be the best way to interact with posts on your network.

StreamItems rows are associated with a raw contact row. They contain the newest updates of that raw contact, along with text, time stamp and comments. They can also have pictures, which are stored in StreamItemPhotos. The number of stream items per raw contact has a limit, which on the current Nexus devices is set to 5, but expect this number to change with future devices. The limit can be queried like this:

private static int getStreamItemLimit(Context context) {
// Note that this URI is safe to call on the UI thread.
Cursor c = context.getContentResolver().query(StreamItems.CONTENT_LIMIT_URI,
new String[]{ StreamItems.MAX_ITEMS }, null, null, null);
try {
c.moveToFirst();
return c.getInt(0);
} finally {
c.close();
}
}

When displayed in the People app, stream items from all participating raw contacts will be intermixed and shown chronologically.

The following function shows how to add a stream item to an existing raw contact:

private static void addContactStreamItem(Context context, long rawContactId, String text,
String comments, long timestamp, String accountName, String accountType){
ContentValues values = new ContentValues();
values.put(StreamItems.RAW_CONTACT_ID, rawContactId);
values.put(StreamItems.TEXT, "Breakfasted at Tiffanys");
values.put(StreamItems.TIMESTAMP, timestamp);
values.put(StreamItems.COMMENTS, comments);
values.put(StreamItems.ACCOUNT_NAME, accountName);
values.put(StreamItems.ACCOUNT_TYPE, accountType);
context.getContentResolver().insert(StreamItems.CONTENT_URI, values);
}

You can also specify an action that should be executed when a stream item or one of its photos is tapped. To achieve this, specify the receiving Activities in your contacts.xml using the tags viewStreamItemActivity and viewStreamItemPhotoActivity:

<ContactsAccountType
xmlns:android="http://schemas.android.com/apk/res/android"
viewStreamItemActivity="com.example.activities.ViewStreamItemActivity”
viewStreamItemPhotoActivity="com.example.activities.ViewStreamItemPhotoActivity">
<!-- Description of your data types -->
</ContactsAccountType>

Update streams are available on API version 15+ and are intended to replace the StatusUpdate API. For previous versions, we recommend that you fall back to the StatusUpdates API, which only shows a single text item and no pictures.

“Me” profile

Ice Cream Sandwich is the first version of Android that supports the “Me” contact, which is prominently shown at the top of the list of the new People app. This simplifies use-cases that used to be a multi-tap process in previous versions — for example, sharing personal contact data with another person or “navigating home” in a navigation app. Also it allows applications to directly address the user by name and show their photo.

The “Me” profile is protected by the new permissions READ_PROFILE and WRITE_PROFILE. The new functionality is powerful; READ_PROFILE lets developers access users’ personally identifying information. Please make sure to inform the user on why you require this permission.

The entry point to the new API is ContactsContract.Profile and is available on API version 14+.

Add connection

Previously, connecting with users on a social network involved opening the respective social networking app, searching for the person and then connecting (“Friend”, “Follow” etc.). Ice Cream Sandwich has a much slicker approach: When looking at an existing contact in the People application, the user can decide to add this person to another network as well. For example, the user might want to follow a person on Google+ that they already have as a contact in Gmail.

Once the user taps one of the “Add connection” commands, the app is launched and can look for the person using the information that is already in the contact. Search criteria are up to the app, but good candidates are name, email address or phone number.

To specify your “Add connection” menu item, use the attributes inviteContactActivity and inviteContactActionLabel in your contacts.xml:

<ContactsAccountType
xmlns:android="http://schemas.android.com/apk/res/android"
inviteContactActivity="com.example.activities.InviteContactActivity"
inviteContactActionLabel="@string/invite_action_label">
<!-- Description of your data types -->
</ContactsAccountType>

Be sure to use the same verb as you typically use for adding connections, so that in combination with your app icon the user understands which application is about to be launched.

The “Add connection” functionality is available on API version 14+.

Contact-view notification

High-resolution pictures need a lot of space, and social streams quickly become outdated. It is therefore not a good idea to keep the whole contacts database completely in sync with the social network. A well-written sync adapter should take importance of contacts into account; as an example, starred contacts are shown with big pictures, so high-resolution pictures are more important. Your network might also have its own metrics that can help to identify important contacts.

For all other contacts, you can register to receive a notification which is sent by the People app to all sync adapters that contribute to a contact whenever the contact’s detail page is opened. At that point, you can provide additional information. As an example, when the Google+ sync adapter receives this notification, it pulls in the high-resolution photo and most recent social stream posts for that user and writes them to the contacts provider. This can be achieved by adding the viewContactNotifyService attribute to contacts.xml:

<ContactsAccountType
xmlns:android="http://schemas.android.com/apk/res/android"
viewContactNotifyService="com.example.notifier.NotifierService">
<!-- Description of your data types -->
</ContactsAccountType>

When this Intent is launched, its data field will point to the URI of the raw contact that was opened.

These notifications are available with API version 14+.

Summary

With Ice Cream Sandwich, we improved key areas around high resolution photos and update streams, and simplified the creation of new connections.

Everything outlined in here is done using open APIs that can be implemented by any network that wants to participate. We’re excited to see how developers take advantage of these new features!

Read More..

Wednesday, June 25, 2014

Making Android Games that Play Nice

[This post is by Ian Ni-Lewis, a Developer Advocate who devotes most of his time to making Android games more awesome. — Tim Bray]


Making a game on Android is easy. Making a great game for a mobile, multitasking, often multi-core, multi-purpose system like Android is trickier. Even the best developers frequently make mistakes in the way they interact with the Android system and with other applications
 — mistakes that don’t affect the quality of gameplay, but which affect the quality of the user’s experience in other ways.

A truly great Android game knows how to play nice: how to fit seamlessly into the system of apps, services, and UI features that run on Android devices. In this multi-part series of posts, Android Developer Relations engineers who specialize in games explain what it takes to make your game play nice.

I: The Audio Lifecycle (or, why is there music coming from my pants?)

One of the most awesome things about Android is that it can do so much stuff in the background. But when apps aren’t careful about their background behaviors, it can get annoying. Take my own personal pet peeve: game audio that doesn’t know when to quit.

The problem

I’m on the bus to work, passing the time with a great Android game. I’m completely entranced by whatever combination of birds, ropes, and ninjas is popular this week. Suddenly I panic: I’ve almost missed my stop! I leap up, quickly locking my phone as I shove it into a pocket.

I arrive breathless at my first meeting of the day. The boss, perhaps sensing my vulnerability, asks me a tough question. Not tough enough to stump me, though — I’ve got the answer to that right here on my Android phone! I whip out my phone and press the unlock button... and the room dissolves in laughter as a certain well-known game ditty blares out from the device.

The initial embarrassment is bad enough, but what’s this? I can’t even mute the thing! The phone is showing the lock screen and the volume buttons are inactive. My stress level is climbing and it takes me three tries to successfully type in my unlock code. Finally I get the thing unlocked, jam my finger on the home button and breathe a sigh of relief as the music stops. But the damage is done — my boss is glowering and for the rest of the week my co-workers make video game noises whenever they pass my desk.

What went wrong?

It’s a common mistake: the developer of the game assumed that if the game received an onResume() message, it was safe to resume audio. The problem is that onResume() doesn’t necessarily mean your app is visible — only that it’s active. In the case of a locked phone, onResume() is sent as soon as the screen turns on, even though the phone’s display is on the lock screen and the volume buttons aren’t enabled.

Fixing this is trickier than it sounds. Some games wait for onWindowFocusChanged() instead of onResume(), which works pretty well on Gingerbread. But on Honeycomb and higher, onWindowFocusChanged() is sent when certain foreground windows — like, ironically, the volume control display window — take focus. The result is that when the user changes the volume, all of the sound is muted. Not the developer’s original intent!

Waiting for onResume() and onFocusChanged() seems like a possible fix, and it works pretty well in a large number of cases. But even this approach has its Achilles’ heel. If the device falls asleep on its own, or if the user locks the phone and then immediately unlocks it, your app may not receive any focus changed messages at all.

What to do about it

Here’s the easy two-step way to avoid user embarrassment:

  1. Pause the game (and all sound effects) whenever you receive an onPause() message. When gameplay is interrupted — whether because the phone is locked, or the user received a call, or for some other reason — the game should be paused.


  2. After the game is paused, require user input to continue. The biggest mistake most game developers make is to automatically restart gameplay and audio as soon as the user returns to the game. This isn’t just a question of solving the “music over lock screen” issue. Users like to come back to a paused game. It’s no fun to switch back to a game, only to realize you’re about to die because gameplay has resumed before you expected it.


Some game designers don’t like the idea of pausing the background music when the game is paused. If you absolutely must resume music as soon as your game regains focus, then you should do the following:

  1. Pause playback when you receive onPause().


  2. When you receive onResume():

    1. If you have previously received an onFocusChanged(false) message, wait for an onFocusChanged(true) message to arrive before resuming playback.


    2. If you have not previously received an onFocusChanged(false) message, then resume audio immediately.


  3. Test thoroughly!


Fixing audio embarrassments is almost always a quick and easy process. Take the time to do it right, and your users will thank you.

Read More..